

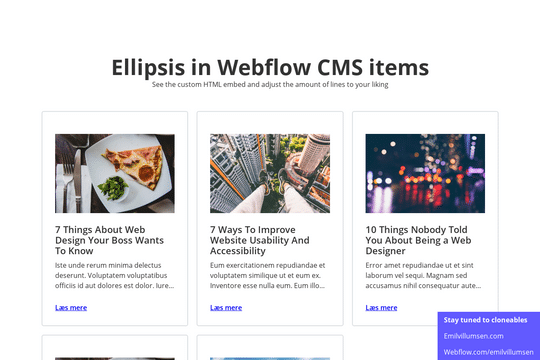
In the world of web design, maintaining a clean and consistent layout is crucial. One effective technique to achieve this is the Ellipsis After Text Limit. This method allows you to artificially limit the number of lines of text displayed in a paragraph, ensuring that your design elements remain uniform and visually appealing.
Why Use the Ellipsis After Text Limit?
- Consistency in Design: By limiting the text, you can ensure that all your design elements, such as cards or text blocks, have a similar appearance. This is particularly useful when dealing with dynamic content that varies in length.
- Content Control: For client projects, you might need to restrict the amount of text displayed to keep the focus on key information. This technique helps in managing content effectively without overwhelming the viewer.
How to Implement It
To achieve the Ellipsis After Text Limit effect, you can use a simple HTML embed code. This code snippet can be adjusted according to your specific needs, making it a versatile tool for any project.
<div class="text-limit">
  <p>Your text goes here...</p>
</div>

<style>
.text-limit p {
  display: -webkit-box;
  -webkit-line-clamp: 3; /* Number of lines to show */
  -webkit-box-orient: vertical;
  overflow: hidden;
  text-overflow: ellipsis;
}
</style>
A Webflow Solution
This technique has been expertly crafted by Emil Villumsen and is available as a cloneable project in Webflow. It falls under the Card, Text Effects, and CMS categories, making it a versatile addition to your design toolkit.
Conclusion
The Ellipsis After Text Limit is a powerful method for controlling the amount of text displayed in your Webflow projects. Whether you're aiming for design consistency or content limitation, this technique is easy to implement and highly effective. Give it a try and see how it can enhance your web design projects!
---
Feel free to explore this cloneable in Webflow and start creating visually appealing, consistent designs today!


